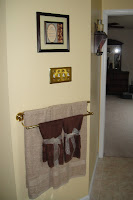
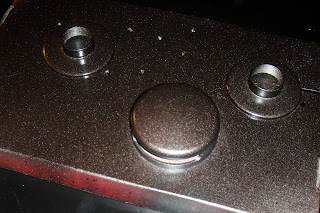
Yep. I did it! I spray painted my bathroom fixtures. Faucets, drains, light fixtures, toilet paper holder, outlet and light switch covers...even the handle on the toilet.
It was quite a bit of work, and even more clean up, but I am SO thrilled with the result, and the savings! It saved me hundreds of dollars over replacing everything with oil rubbed bronze equivalents. Rustoleum Universal, you are my BFF!
I think I've mentioned it here before, but my master bath was pale yellow. YELLOW with GOLD everything! Very bright and sunny, but not the relaxing oasis I had in mind. I like yellow...but I don't love it. And I like gold, but I don't love it. I wanted more of a neutral palette.
So, I painted the walls a beautiful beige (I think it was Sherwin Williams Perfect Beige, but it might be Practical Beige, I can't remember off the top of my head)... and then I went to work with my trusty BFF Rustoleum's Universal Metallic Oil Rubbed Bronze. Pictures DO NOT do this paint justice. It's almost black, with a warm, rich gold shimmer. It's very pretty.
I painted the knobs on this shelf months and month and MONTHS ago to see how it would hold up in the bathroom. This shelf is right across from our shower (maybe three feet, and I take HOT showers with lots of steam going on), and we use the hooks for towels, robes, whatever. Sometimes I even hang my glasses on them, haha. Not a chip on them. I didn't even wait more than a day after painting to start using the hooks either. I think that's when I fell in love with this spray paint.
So, anyway...
I cleaned all the fixtures, and the scrubbed them with a sandpaper block. And then cleaned them again. I was lazy with my sanding. My sandpaper was very fine and wasn't doing much anyway.
For anything that was going to potentially come in contact with water, I used this Rustoleum Automobile Primer. I wanted it to be able to hold up to high heat and just be really durable. I figured Automobiles get the worst of everything, heat, cold, scratches, and just generally being beat up...if it could stand up to that, surely it could stand up to my bathroom faucets.
I took my bathtub faucet off, put some painters tape where I didn't want paint to end up, and went to town.
So much better!
I took as much off of the bathtub as I could figure out on my own. Cleaned it, sanded it a bit, and cleaned it again.

On went the auto primer.
On went my spray paint BFF.
I took off all the knobs and cabinet handles, and gave them a coat of spray paint too. I did not bother with primer.
Took down the light fixutre and painted that.
All went well until we went to put it back up and broke one of the glass light covers. Now I have to find a replacement or change them all out. Bummer since I was trying to save money.
I still think it looks 100% better than the bright brassy gold!
I painted the toilet paper holder...
Lightswitch covers.
Towel rings and outlets.
Towel bars. Basically anything I could get my hands on that was still gold.
Pre cabinet knob transformation, haha.
The shower proved a bit tricky.
I got the shower head off, primed and painted. I couldn't get it back together, but my handsome husband saved the day on that one, I was putting it together backwards or upside down or something...haha. We couldn't figure out how to get this thing out of the wall though. The pipe the shower head attaches to. I'm sure it has a name. But I'll be darned if I knew. I didn't want any paint to get on the wall, so I thought I'd try using a box. I cut a hole and slipped it over. Primed, painted. Waited for it to dry. Removed the box too soon and smudged my paint (impatient is a part of my personality, for sure). Not only did I smudge my paint, but I didn't take into account the depth of the cardboard and had some gold still showing where the cardboard was covering it.
So I just taped up a bunch of newspaper and painted it that way. I did put painters tape over the threads (is that what they're called?) so I wouldn't have any trouble getting the shower head screwed back on.
MUCH better. Phew!
I spray painted the shower curtain rod and the holders that were attached to the wall. I did prime the curtain rod because I knew the metal shower curtain hooks would be sliding across all the time.
I hand painted the shower knob. I taped around it, and used a small paint brush to prime it, two coats, letting dry between each. Then three coats of of the spray paint, I just sprayed it into a cup and used a small soft paint brush. It looks messy after the first coat, but after the second and third it's pretty flawless, not much different than if I'd actually spray painted it. I'm sure I could have taken it off, but I was home alone and just wanted it DONE...without breaking anything if at all possible, haha. ;)
I did the same thing with the toilet handle. Two coats of primer with a paint brush. I just sprayed the primer into a cup.
Three coats of Oil Rubbed Bronze, sprayed into a cup and painted on with a brush. I'm sure these are simple enough to get off too...but like I said, home alone, limited knowledge of NOT breaking stuff... ;)
Onward! I used newspaper to tape up/around the sink faucets and drains.
In retrospect, I'm not sure I would use newspaper again. Cheap plastic drop cloths would work much better, because not only did the ink bleed onto my counter tops/sink, but the paint bled through a bit too. It ended up with me in the bathroom for quite awhile scrubbing it down with a magic eraser. It all came off, it just took awhile. Honestly, the clean up was more work than the painting!
I do think it would have been better to take the faucets out, but since I didn't know how, and didn't want to mess with plumbing, I took this route. It worked just fine, but just keep clean up in mind. It wasn't terrible, but I should have put more drop cloths down on the floor and used something other than newspaper to line my sinks.
I did put a drop cloth over my mirror and over my cabinets. I just taped them up and draped them around to make them stay.
Primed!
I have one window in my master bath...so I had it all the way open, and had my exhaust fan on, as well as the windows in my bedroom open. I would spray what I needed to and quickly run out of the bathroom so as not to breathe it in.
Yes, I know, I should wear a mask.
Three LIGHT coats of ORB.
I made sure to paint from angles so I got the back, sides, underneath....everywhere.
The one thing I really DO wish I'd taken out to paint? The drains. The paint puddled a bit and left them not as smooth as I would have liked. I'm sure if I'd used even more of a lighter hand I could have avoided this, but eventually I am probably going to take them out and sand them down and repaint them.
In between coats I hung out in my bedroom watching the Olympics.
I waited to post this because I'm lazy because I wanted to be able to tell you how well it was holding up.
Beautiful!
After I painted them and they dried, I used some paint in a cup and a small brush to get the underside of the faucet so you didn't see any gold when it was all the way turned on for water. I didn't even turn the water off for this part, I just let the water run for a minute while I painted, and then pushed it back down into the off position. It didn't mess up the paint I'd just done at all. I did this twice, with only the ORB, didn't bother with the primer since I was probably the only one going to notice it anyway.
Isn't it pretty?! I am loving my "new" master bath!
Yes, the bath tub has paint in it (if you're looking closely enough), I didn't take out the drain and painted it in place, and used newspaper so it was the same issue as the sinks. It's since been scrubbed out and is back to sparkling. Magic Erasers to the rescue!
All have I have left is to replace that glass in the light fixture, find rugs to fit the measurements of the bath and shower, and get some art work or something for over the tub.
A girl's gotta have a place to relax! Some bubbles, a good book...maybe a glass of wine... ahhh. :)
As for how it is holding up, well I did this early August...it's now mid October, two and a half months later, and it's holding up great. I've had several piping hot baths and tons of hot showers, and not a chip in the paint at all!
And, even if there was? The best thing about this is that the paint is cheap, and you can just either repaint the fixture, or you can spray some into a cup and brush a little on the chip or scratch for an instant, easy, fix. I did have to do this on my shower curtain rod, but that was my own fault for being impatient and not waiting for it to fully dry before I put it up. I bumped into it and scratched it. Rather than take it down, I wet sanded the area a little with super fine sand paper, brushed a little paint on and that was that.


No comments:
Post a Comment